http://extras.humdrum.org/onlineThe webpage will remember the last command you used, so any command may load when the above page is viewed (useful if you accidentally leave the page).
http://extras.humdrum.org/online/?command=mkeyscapeThe command-line arguments will be blank.
http://extras.humdrum.org/online/?command=mkeyscape%20-ln%20h://chopin/preludes/prelude28-02.krnNote that spaces are encoded as '%20' in URLs. The above URL will load the command mkeyscape with the arguments:
-ln h://chopin/preludes/prelude28-02.krn
http://extras.humdrum.org/online/?command=mkeyscape%20-ln%20h://chopin/preludes/prelude28-02.krn&run=true
http://extras.humdrum.org/online/?command=rscale%20-f%202%20h://370chorales/chor001.krn%20&run=true&view=tableXML "view=tree" example:
http://extras.humdrum.org/online/?command=hum2mei%20h://370chorales/chor001.krn%20&run=true&view=tree
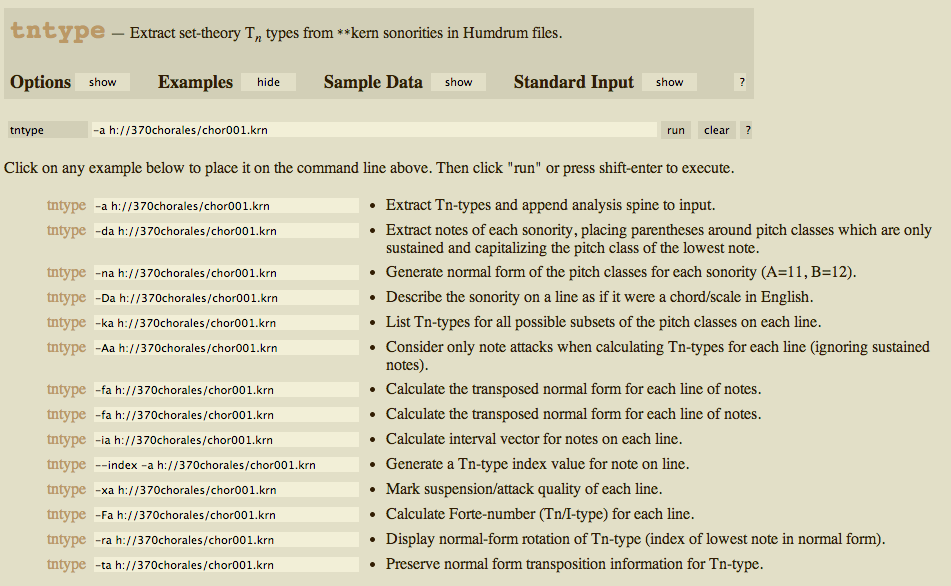
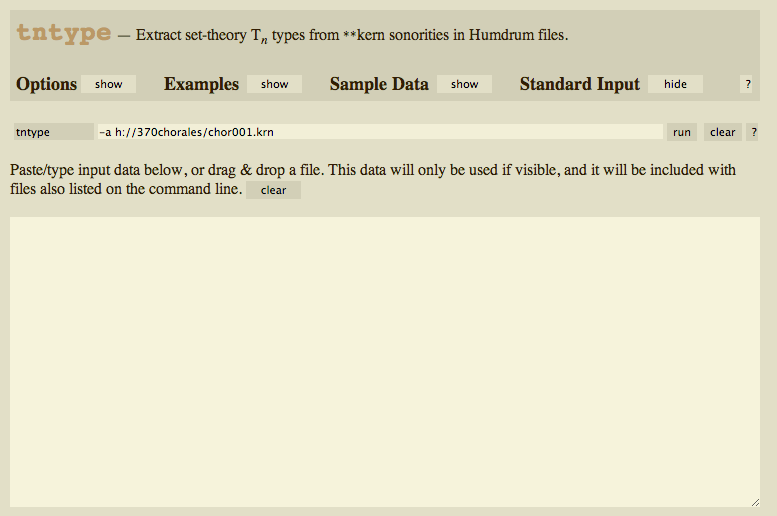
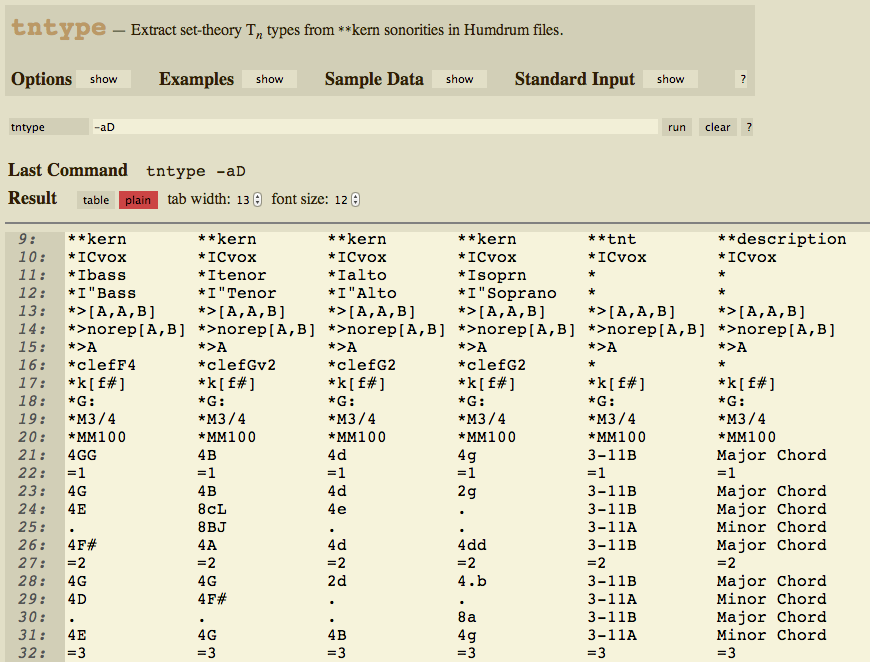
When a particular command is selected, its name and a short summary
of its purpose will be listed at the top of the page along with four buttons
for documentation and data input. Here is an example of the
command summary section when the
tntype command is active:
Clicking the name of the command on the top line will open up
the full manual page for the program. To view a list of the options
for the command, type ctrl-1 ,
ctrl-o (lowercase letter "O"),
or click on the "show" button after the word "Options" to
toggle a list of options with brief descriptions:

Clicking on the ⓘ icons will open the manual page for the command and move to the point in the description where that option is discussed (but not in the above example since it is a screenshot). Notice that the button to the right of "Options" has changed from "show" to "hide". Click on the "hide" button to hide the options list, or equivalently do ctrl-1 or ctrl-o.
The Examples show button at the top of the page will display a
list of example usages of the command. Click on "show" after "Examples"
to make the list visible. It will be displayed underneath the list of
options, so close that list if it is too long to see the examples and
the top of the page. Alternatively ctrl-2
or ctrl-e will toggle the Examples display:
Notice that when the tntype command was selected for the command line, some arguments were automatically loaded. These were from the first example in the examples list.
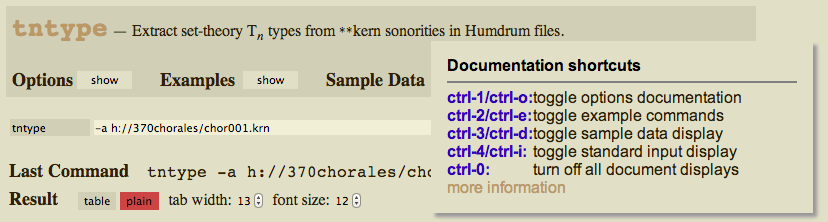
An additional keyboard shortcut, ctrl-0 (zero), will close all open documentation components in the to list.
Additional information can be found by hovering the mouse over the
"?" buttons at the top right of the page:
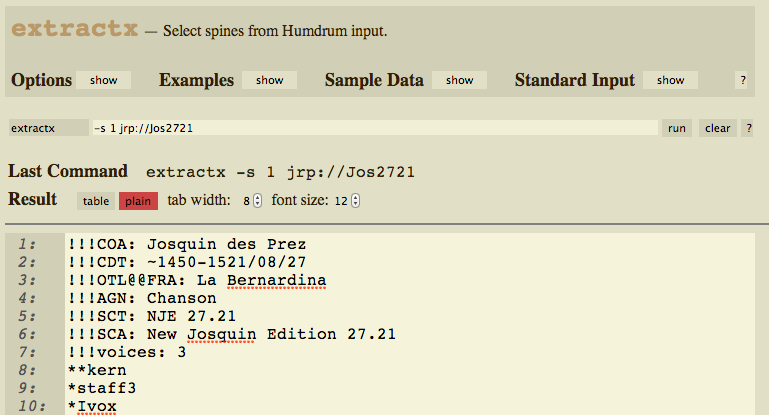
The Humdrum Online web interface has several methods for loading input data to be processed. At the most basic level a filename can be typed into the command-line arguments. Typically this will be a directory and filename prefixed by "h://" which indicates that it will be downloaded from kernscores.
In the following example, the argument list for extractx is
"-s 1 h://370chorales/chor001.krn". The characters
"-s 1" is an
optional argument which indicates that the first (left-most) spine in
the input data should be extracted. The actual input data is
"h://370chorales/chor001.krn" which is referring to
this datafile
on kernscores in a collection of 370 Bach four-part chorales. Any data file on the kernscores website
can be downloaded using this method of applying "h://" to any
file location in kernscores.

Additionally, data can be downloaded from the
Josquin Research Project website
by prefixing "jrp://" to a JRP catalog number (along
with optional title information):
Data cannot be downloaded from any URL on the web due to the same-origin policy in JavaScript which allows only communication with the server from which the page was loaded. However, the additional website could be added to the interface by passing the data through the server.
A useful keyboard shortcut for working with filenames on the command line is ctrl-delete. This shortcut will delete the last "word" (contiguous non-space characters) in the arguments list. This shortcut will work regardless of whether or not the focus is on the argument list. ctrl-Z is approximately the reverse of ctrl-delete, since it will replace the deleted word(s) back onto the end of the argument line.
A secondary method of adding data filenames to the command line is by using the "Sample Data" at the top of the page. Clicking on the "show" button after "Sample Data" will display a list of repertories. This data list can also be open/closed with ctrl-3 or ctrl-D.
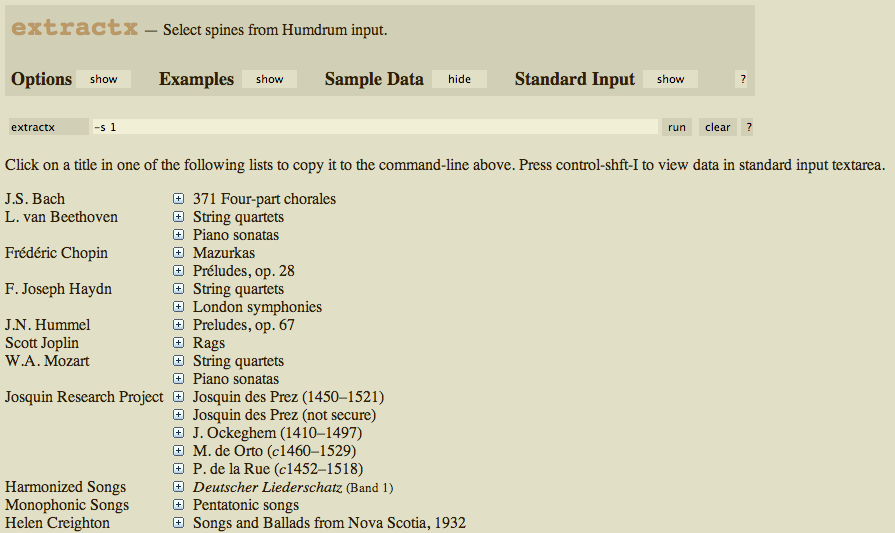
Clicking on a "+" sign will open up a list of works available for that
particular repertory (but this won't work in the above example because it
is a screenshot). In the following example, the Chopin Préludes,
op 28 repertory has been revealed. If you click on any of the titles
in the list, the associated filename will be appended to the argument list.
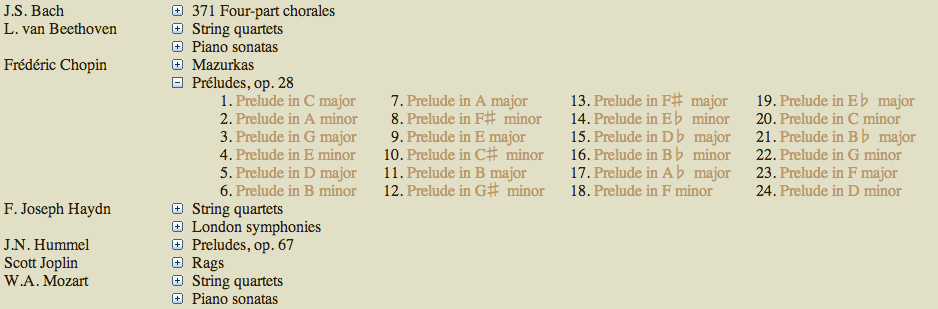
Clicking on the title for the prelude in F minor adds its filename to the
argument list:

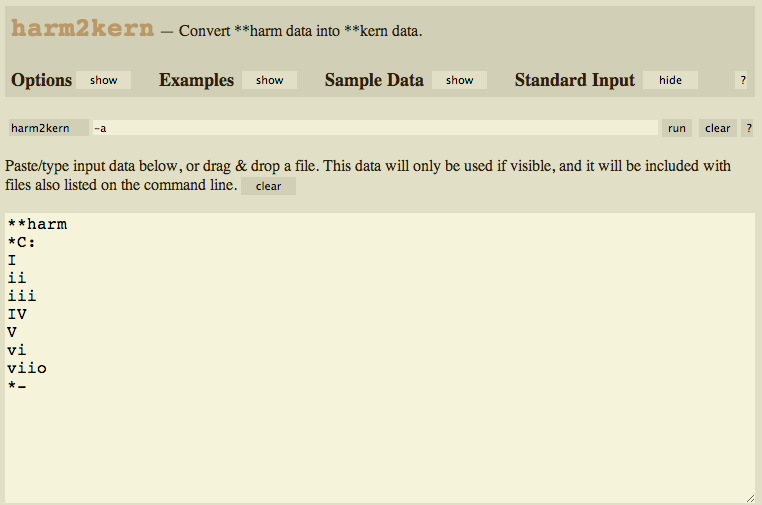
An additional method of data input is done with the standard input
text area which can be displayed by clicking on the "show" button
after "Stanford Input" in the top of the page. This text area can
also be displayed with the ctrl-4 or
ctrl-i keyboard shortcuts:
When using the standard input text area, it is important to keep in mind that any data files listed in the command-line arguments will also be input into the program for processing. Remember to type ctrl-delete. Also note that the standard input text area will not be processed by the command if it is not visible, and of course if it is empty.
A useful
feature of the user interface is ctrl-shift-I
which will download any data files into the standard input text area.
This is useful for case where you want to modify content in a data file
before processing it (such as set the tempo or analytic key). For example
if the file on the command line is "h://370chorales/chor001.krn",
then pressing ctrl-shift-I will download
the contents of the data file into the standard input area:
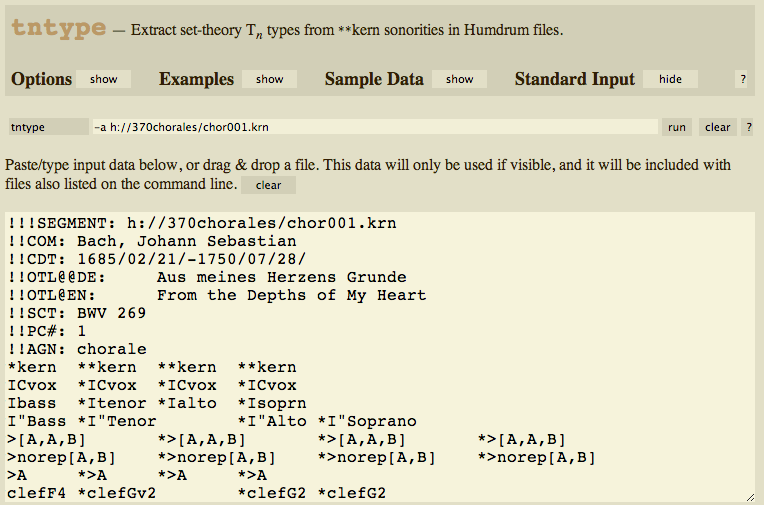
The file's content is now displayed in the standard input area. Multiple files can be downloaded into the standard input area. Each file will be prefixed with a line starting with "!!!!SEGMENT: which indicates the original filename before it was copied to the browser. Again, remember to press ctrl-delete if you do not want to double-process data from the argument list and standard input.
The result of a command can be recycled to standard input for another process, by typing ctrl-R (for recycle results). This will cause the current contents of standard input to be erased, and the data output of the last command execution to be placed in the standard input text area. Note that the data will not be appended to the current contents of standard input, but rather it will replace the current contents. If you do this by accident, the ctrl-shift-R shortcut can be used to restore the standard input content before the data output was recycled.
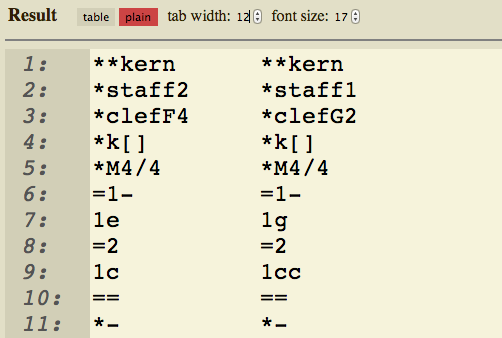
Here is the final result of these two commands:
tntype -a h://370chorales/chor001.krn | tntype -aD
The first command run was:
tntype -a h://370chorales/chor001.krnThis adds an analysis spine listing the Tn-type pitch-class set name for the pitches on each data line. The output of this command was then recycled to standard input with the ctrl-R shortcut, and a second command was run:
tntype -aDThis took the data from standard input and appended a second analysis column to the end of the data lines which describes the Tn-types in more musical terms (the intermediate standard input is hidden to conserve space in the example).
Files on your local hard disk can be loaded into the standard input area by dragging them from the Desktop or a file viewer into the standard input text area. If data is already present in the text area, the dragged file will be appended at the bottom of all other data.
Of course, you can also type data into the text area directly:
For advanced users who know vi (a tautology), alt-V can turn in a vi emulator for editing text areas, and alt-shift-V will turn off the emulation. The vi emulation is not complete, but many vi features are available. Use ":wq" to exit from the text area when editing with vi. If you are already focused on a text area when you start the emulation, you will have to shift focus to something else and then re-click in the text area to start the full-window editor.
The command can be selected by clicking on the command name to the left of the argument list. This will bring up a list of commands from which you can select one. Once a command has been selected, you can type ctrl-delete to remove the initial example arguments.
The shift-up and shift-down shortcuts can also be used to step through the command list.
There are three methods to run a command. Firstly you can click on the "run" button to the right of the argument list. Secondly you can press enter when editing the argument list. And lastly, you can run the command from anywhere on the page by pressing shift-enter.
When a new program is run, it first must be downloaded from the server. Depending on your connection speed and distance to the server this will take a variable amount of time. This wait is typically less than a second for fast connections. While the program is downloading and executing, the text "Processing..." will be displayed in the results section of the webpage. The execution is done in blocking (synchronous) mode, so nothing else can be done on the page while the program runs.
The three main command result data formats are: Humdrum data, XML data, and images. Humdrum and XML data have two possible views: either as plain text in a <textarea> element, or as data with markup enhancements.
The default view is "plain":

In this view style, Humdrum data is shown in a fixed-width font with line numbers on the left edge of the display. The red "plain" button indicates the display style. To the right of the "plain" button are controls for the tab width and font size (these are difficult to change in Firefox, since it does not support number-box input fields).
Here is an example of changing the tab size to 12 and the font size to 17pt:
When data is first displayed in a <textarea>, the best size for tab characters is calculated based on the maximum field width of any token (with a maximum automatic tab size of 20 spaces).
The keyboard shortcuts ctrl-P and ctrl-T can be used to toggle between plain and table views of Humdrum data respectively.
XML data is displayed in a <textarea> by default:
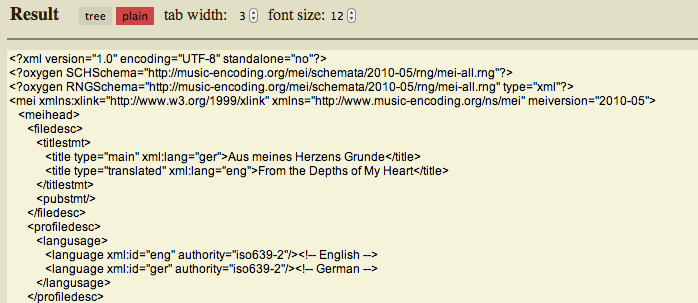
Clicking on the 'tree' button will display the XML data in a collapsible
tree format:
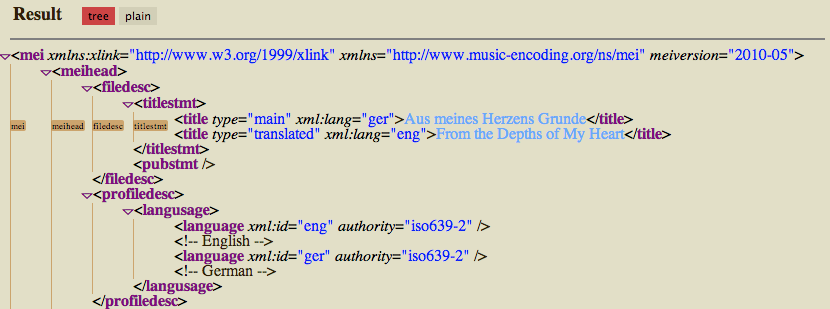
When the XML data is displayed as a tree, tooltips marking each ancestor level of the structure will follow the pointer. In the above example, the pointer is over the <title> elements and the ancestors listed in the tooltips are mei → meihead → filedesc → titlestmt.
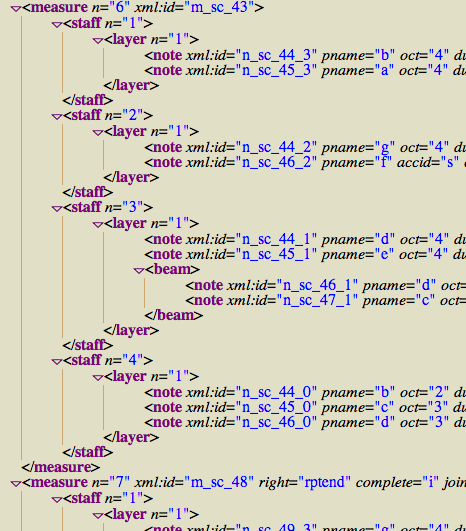
MEI measure numbers are shown underneath measure ancestor tooltips.
Likewise, staff and layer numbers are displayed underneath their ancestor
tips as well. In this example the mouse cursor is above notes
in layer 1 of staff 2 in measure 2:

The keyboard shortcuts ctrl-P and ctrl-T can be used to toggle between plain and tree views of XML data respectively.
Two additional keyboard shortcuts affect the XML data tree view: alt-click and alt-shift-click.
Normally clicking on the triangle icon in front of
elements with children will cause the contents of that element to
be hidden/make visible again. Doing alt-click
on the triangle will cause all elements in the data with the same name
to collapse/uncollapse at the same time. Here is an example
when shift-clicking on a measure element to
collapse all measures:
After alt-clicking on the downward
pointing triangle to the left of <measure> 6, the display will look
like this:
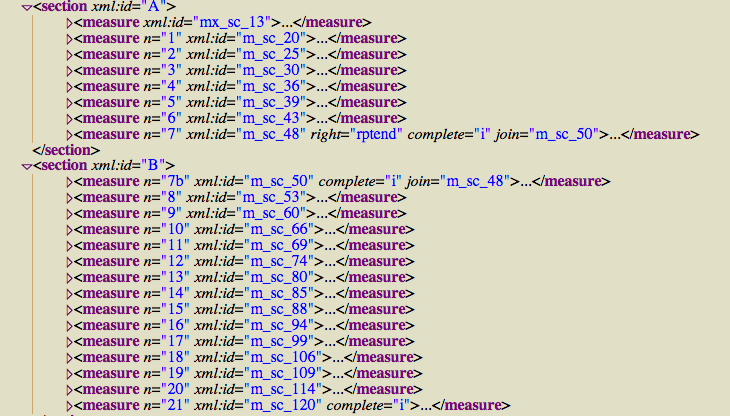
Now the list of all measures in the score becomes more apparent since all measure children have been hidden. Individual measures can be viewed with a regular click on the right-pointing triangle before each measure element name. All of the measures can be expanded at the same time by alt-clicking on any of the right-point triangles beside the collapsed measure elements.
Using alt-shift-click on any element's open/close triangle will cause every element in the data to toggle open or close at the same time. This is useful for tracing through the tree structure from the root node.
Another feature of XML tree displays for MEI and MusicXML is that each element name is a hyperlink to documentation about that element.
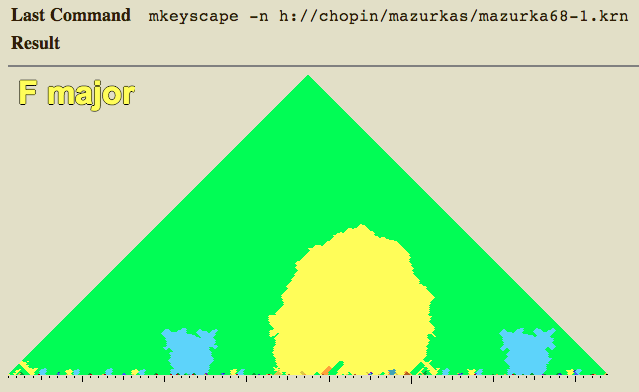
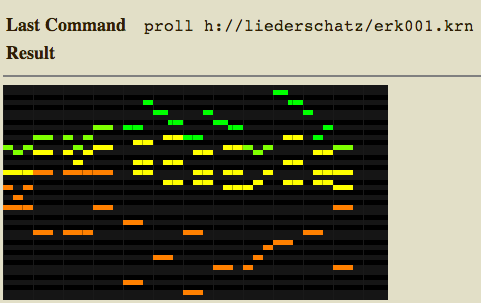
The proll
and mkeyscape
commands output images so instead of text output results, the resulting
image will be displayed. here is an example piano roll output:
For mkeyscape output, moving the mouse cursor over the
image of the keyscape will display the name of the key underneath
the cursor. In the following example, the mouse cursor is over the
yellow region of the plot: